11 feb 2013

Tutorial: Felt wedding bouquet – Ramo de novia de fieltro

Something for the brides today! I want to show you my wedding bouquet! Isn’t it cute? Well girls, you must know it’s really easy to do one like these!

~~&~~ 

¡Novias atentas hoy! Os quería enseñar mi ramo de novia… ¿verdad que es mono? ¡Pues que sepáis que es muy fácil hacer uno!


First of all, you must choose the color of the felt. I wanted something discreet so I chose ivory-white and beige. And by the way, I used real wool felt, not the scratchy synthetic one. I think it looks finer this way.

For the stems of the flowers I used aluminum wire (I think it’s better than a stick because you can mold it, and that’s practical when you have to arrange the flowers in a bouquet form). My initial idea was to pin the flowers on a Styrofoam form (covered by cloth), but I didn’t find it on time.

~~&~~ 

Primero de todo tenéis que escoger el color del fieltro. Yo quería algo discreto, así que escogí un blanco marfil y un beige. Y por cierto, usé fieltro de lana natural, no el sintético, que es un tanto rasposo. Creo que queda más “fino” de esta manera, además la ocasión lo merecía. 

Para los tallos de las flores usé alambre de aluminio (básicamente porque es lo que tenía a mano). De todas maneras creo que es mejor que cualquier varita o palito de madera, ya que se puede moldear, y eso es práctico a la hora de organizar las flores en forma de ramo. Aunque en realidad, mi idea inicial era clavar las flores a una forma de porexpán cubierta de tela, pero no lo encontré a tiempo.


Let’s begin with the flowers:

- Cut out the forms for the “daisies”, so that they combine. Then attach the wire to the lowest layer of the flower (see photo below), sew the rest of the layers together and add some pearl beads or buttons in the center part.

- I explain in another tutorial how to do the “mums” and the “roses”. In the photo below you can see how they are attached to the wire (the same way for both types of flowers).

Once you have all your flowers done, you can put them together and tie them with rubber bands. 

~~&~~ 

Empecemos con las flores: 

- Cortad las capas para las “margaritas” de manera que combinen. Entonces pasad el alambre por la última capa de la flor (foto abajo), cosed esta capa a las que vayan encima, y añadid perlitas o botones en el centro de la flor.

- En otro tutorial cuento cómo hacer “crisantemos” y “rosas”. En la foto de abajo podéis ver cómo unirlas al alambre (de la misma manera para ambos tipos de flores). 

Una vez tengáis todas las flores hechas, juntadlas y fijadlas con un par de gomas.


Now I’m going to explain the next steps I took, but I don’t think this is the “professional way” to do wedding bouquets.

I wrapped the stems with the half of one cloth piece, to make the grip softer. The rest of the cloth was under the flowers. It gives the bunch the round form, keeps the flowers in their place, and it also hides the wire.

As you can see, the cloth is not intended to be seen, but since you may have some space between the flowers, choose something that matches in color and material.

Finally, I covered the whole grip rolling a ribbon spiral. The little butterfly was my “something blue”. 

~~&~~

Ahora voy a explicar los siguientes pasos que hice yo, aunque aviso que no creo ni pretendo  que esta sea la manera “profesional” de hacer ramos de novia.

Primero envolví los tallos de las flores con la mitad de un trozo de tela (era un trapo más bien), para hacer que la “empuñadura” fuera mullidita. El resto de la tela estaba debajo de las flores, esto le da al ramo la forma redonda, mantiene las flores en su sitio, y esconde el alambre.

Como se puede comprobar, la tela se supone que no se ve, pero como las flores se mueven un poco y puede quedar algún espacio entre ellas, usad una tela que pegue en cuanto a color y material. 

Finalmente cubrí la empuñadura enrollando una cinta en espiral. La mariposa fue la “cosa azul” que marca la tradición.


If you want more inspiration, just google “felt bouquet” and you’ll have thousands of images. Find your own style! 

~~&~~ 

Si buscáis más inspiración, poned en google “ramo de fieltro” y os saldrán miles de imágenes. ¡Encuentra tu propio estilo!

8 feb 2013

Tutorial: Felt flowers – Flores de fieltro


Easy-peasy “mums” and “roses” for any purpose!

First of all, you need two pieces of felt. My pieces were 30x3 cm (12”x1.2”) and 17x6 cm (6.7”x2.4”). If you wish bigger flowers just make larger pieces. Then cut them like shown below.

~~&~~

¡“Crisantemos” y “rosas” súper fáciles de hacer, para aplicar a cualquier cosa!

Primero de todo, necesitas dos rectángulos de fieltro. Los míos hacen 30x3 y 17x6 cm. Si quisieras hacer flores más grandes, simplemente corta los rectángulos más grandes (¿qué lógica, verdad? jeje). Después córtalos como en la foto de abajo.


Then roll the flowers:

For the mums roll the felt tight. Then sew the base. I’m sure you can also use glue, but I loooove sewing and I can’t take my hand off the needle!!


For the roses don’t roll the felt tight, otherwise you’d get a strange felt cylinder. Just hold the base of the flower, it’s easier if you do some stitches like I do, or put some glue, and pull out on the “petals” to give it a cone form. To prevent it from moving, sew on the base or glue it as you roll it. It is important to begin rolling with the narrow end.

 ~~&~~
Entonces enrolla las flores:
 
Para los crisantemos enrolla el fieltro para que quede bien apretado. Entonces cose por la base para que no se deshaga la flor. Estoy segura de que se puede usar cola para esto, pero me encanta coser y no puedo dejar mi aguja mucho tiempo a un lado… 

Para las rosas no lo enrolles de forma apretada o te va a quedar un cilindro raro. Simplemente aguanta por lo que será la base de la flor (es más fácil si le das unas puntadas como yo, o pon un poco de pegamento), y tira de los “pétalos” hacia fuera mientras vas enrollando para darle una forma cónica. Es importante empezar a hacerlo por la parte más estrecha de la tira de fieltro.


If you prefer to have a flatter rose, take a look at Rebecca’s tutorial, she does it with the spiral template.


So, even though it’s cold outside and spring is still to come, you can have some flowers in your life right now!!

~~&~~

Si prefirieras una rosa de forma más plana, echa un vistazo al tutorial de Rebecca, que las hace a partir de una plantilla en forma de espiral.


Así que, aunque fuera haga frío y la primavera todavía esté por llegar, ¡pon flores en tu vida ahora mismo!


3 feb 2013

Tutorial: Baby Leggings


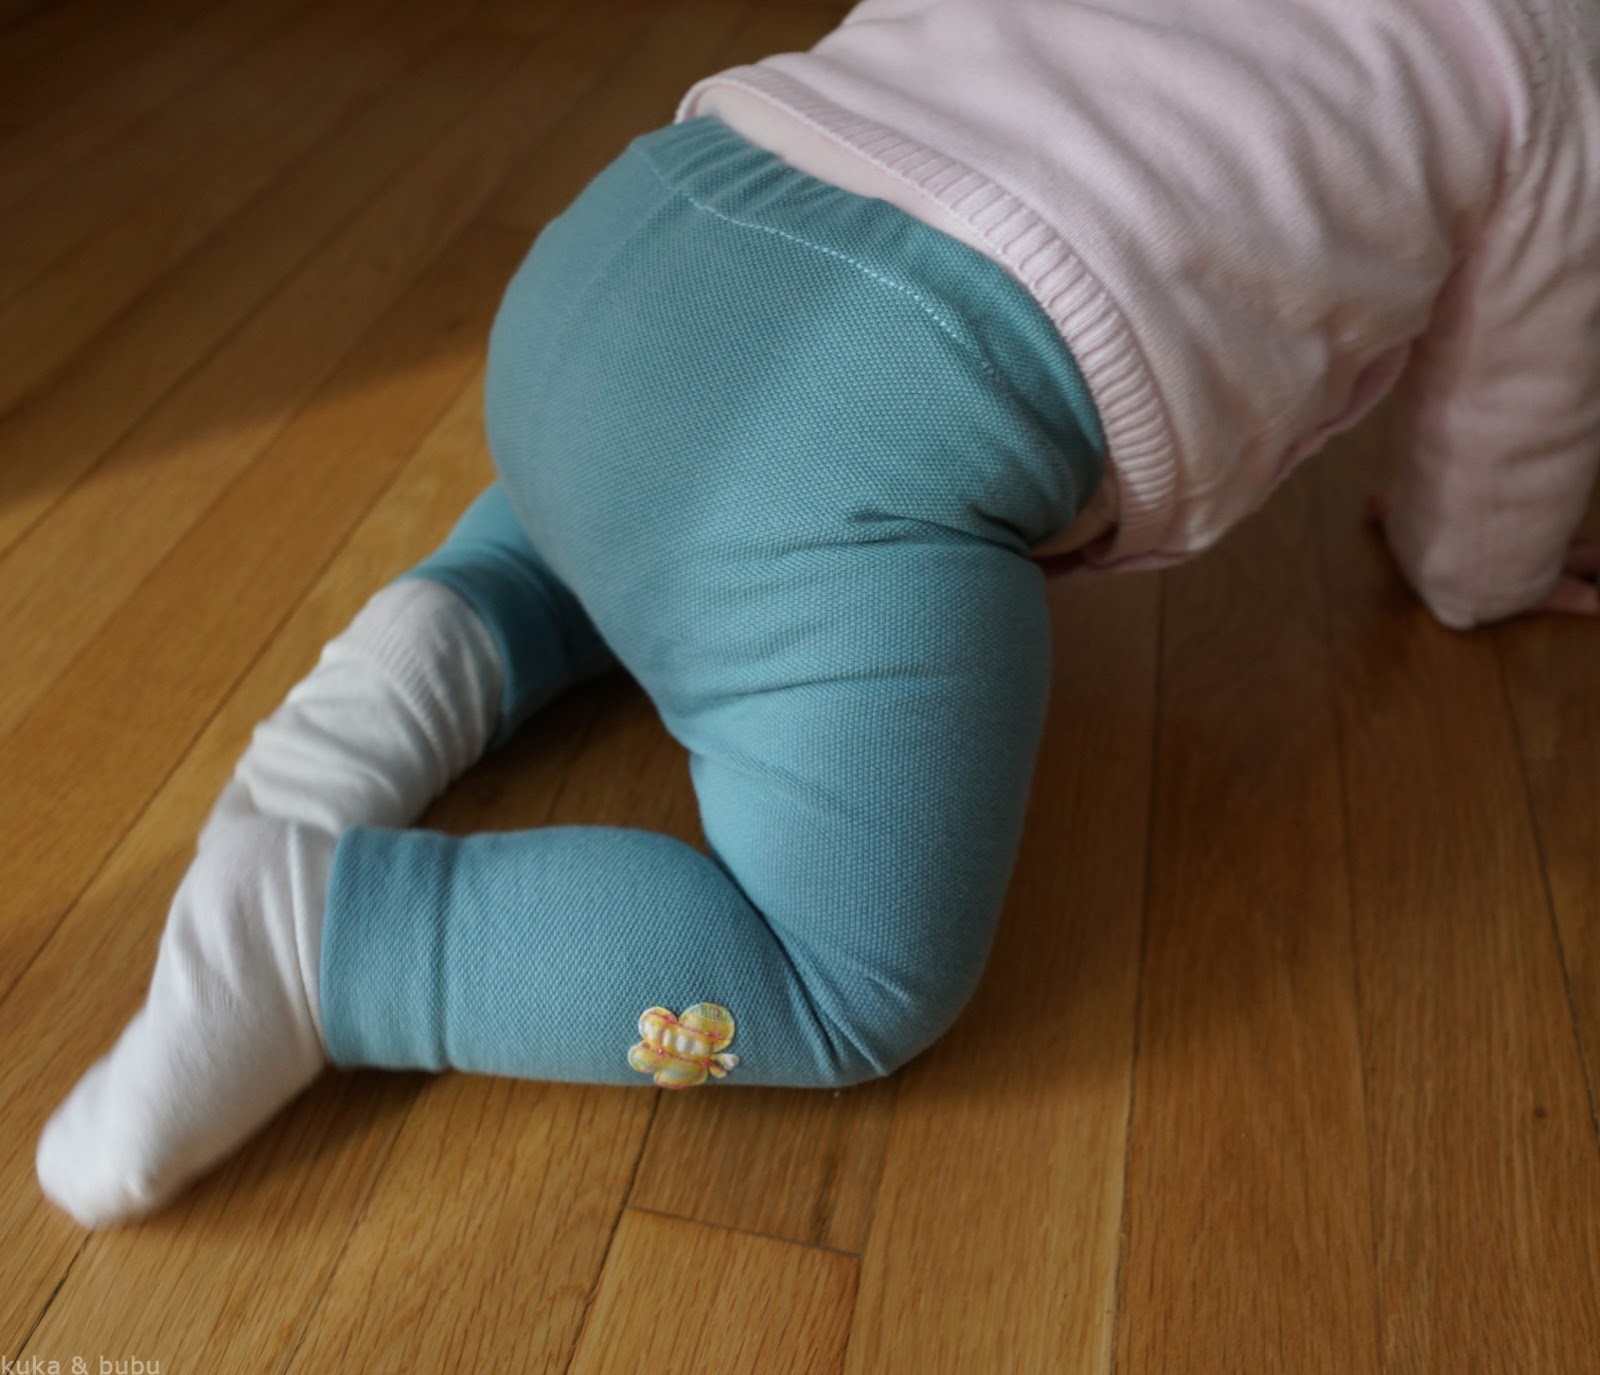
I’ll start posting something very simple but useful! Baby leggings!! Babies have never enough of them, especially when they start crawling, and they aren’t cheap at all at stores.  So, let’s do it yourself!

I upcycled an old T-shirt to sew them, you only need to be sure you choose a stretch fabric, and you can begin. The best of all is that I sewed them from only two fabric pieces, and that I used the hem of the T-shirt as the hem of the leggings. That saves a bit of time.

First of all, you can make your pattern with the help of a pair of leggings, that your baby currently wears. Just think about cutting some extra fabric for the casing.

~~&~~

¡Empiezo por algo bien sencillo pero práctico! ¡Leggins para bebé! De estos nunca se tienen suficientes, sobre todo cuando empiezan a gatear. Además no son nada baratos en las tiendas, así que ¿por qué no hacerlos tu misma?

Yo he reciclado un polo viejo para hacerlos, tu escoge una tela teniendo en cuenta que sea elástica y ya puedes empezar. Lo mejor de todo es que se puede coser a partir de sólo dos piezas, y que si aprovechas el dobladillo de la camiseta como dobladillo de los leggins, te ahorras algo de tiempo.

Primero de todo, hazte un patrón con la ayuda de un par de leggins que tu bebé lleve actualmente. A la hora de dibujar el patrón piensa en añadir algo de tela en la parte de la cintura para hacer el hueco de la cinta.


Notice that the rise (crotch?) is a bit lower in the front, I think they fit better this way, so bear it in mind when you draw your pattern and you cut the fabric. 

(Yep… One day I’ll grow up and I’ll have proper pattern paper…) 

~~&~~ 

El tiro es algo más bajo en la parte delantera, creo que así queda mejor puesto, así que tenlo también en cuenta al dibujar el patrón y al cortar la tela. 

(Sí… Cuando me haga mayor usaré un papel para patrones como Dios manda…)


Once you have the pattern, line up the straight edge with the edge of the folded fabric and cut two pieces, one of them with the pattern upside down, otherwise you would have the same piece twice and they wouldn’t match.

Then put the two pieces with their right sides together, sew the rise, the inner legs, and the casing (don’t forget to thread an elastic through it before sewing it completely!).

You can also add some nice details to them: ruffles on the bottom, a skirt, just like Ashley does in Make It & Love It, pockets, buttons… I only sewed a little butterfly on one side, just to make them more girly.

~~&~~

Una vez tienes el patrón, alinea la parte larga con la tela doblada y corta dos piezas. Una de ella córtala con el patrón puesto del revés, si no te saldrán dos piezas iguales que no te cuadrarán a la hora de coserlas.

Entonces pon las dos piezas cara a cara, cose el tiro, luego la parte interna de las piernas, y finalmente el hueco para la goma elástica (¡sin olvidarte de pasarla antes de coserlo por completo!)

Para terminar puedes añadirle detallitos: volantes en el culete o una falda (como Ashley de Make It & Love It), bolsillos, botones… Yo le añadí simplemente una mariposa en la parte de abajo de una pierna para hacerlo un poco más femenino.


Creative Commons License
This work is licensed under a Creative Commons Attribution-NonCommercial-NoDerivs 3.0 Unported License.